In times of quarantine and contingent spending, we have rediscovered all bakers and yeast is one of the most unavailable products, both in rolls and dry. The solution? The sourdough, although, we warn you, it is not a "ready to go" recipe. It takes patience and attention, because yeast is a living thing. We asked the bakery king, Pizza Hero Gabriele Bonci, to give us his mother yeast recipe. It's about the hard version of the mother yeast, perfect for both sweet and savory leavened products, from doves to panettone, from pizza to bread, passing through croissants and brioches. More than a recipe, to tell the truth, it is a procedure. Follow him and you will have solved the problem of yeast deficiency in the supermarket forever.
Starter
Ingredients
50 g raisins, 50 g flour 0, 120 g water, 100 g manitoba.
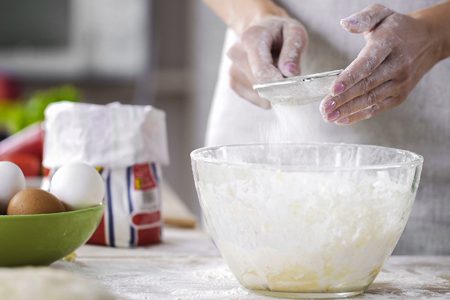
The very first step is to prepare the so-called starter, or a bait or a start to give life to the mother yeast. You start by taking the raisins and rinsing them several times in warm water to wash them of any impurities. Once this is done, place the bowl with the 120 g of water from the recipe and blend everything with a blender, not too homogeneously. Once this is done, you can add the flours and mix in the bowl with circular movements with the help of a spatula. It is not necessary to work it too much, it is sufficient that all the ingredients are well blended and that it is a soft and sticky compound. The result must then be transferred to a large jar, where it can grow 5-6 times. Leave the jar closed with a wet gauze tied as a cap, tied with an elastic band, for 48 hours at room temperature.
1st Refreshment
Ingredients
100 g manitoba flour, 50 g flour 0, 75 g water.
After 48 hours, we take a generous spoonful of the starter that we have prepared and which will have grown 5-6 times. It is appropriate to discard the head of the mixture, which has taken more air, favoring its heart. We then put a portion of starter in a bowl with the flour first and then the water. We mix with a simple spoon, rotating the back of the spoon on the bowl, in order to clean the edge of the bowl. Only once all the ingredients are incorporated we move on the work surface to go to work our compound by hand. We alternate several times by hand, making small folds, to working in the bowl with the spoon. This is to give more oxidation to the dough and make it harder. However, there is no need to add more flour, even when we work it on the surface. When we see that it has become a smooth ball, it is ready and we can leave it to rest. You will need a jar of those with the gasket, to which the gasket must be removed, so that there is oxygen exchange.
Subsequent refreshments
With the same ingredients and the same procedure as the previous refreshment, the yeast thus prepared must be refreshed every 48 h, always discarding the tip and using the heart of the dough. Over time the mass will increase and it will also be necessary to change the can, using a larger one at a time. The mother yeast will be ready after 31 days of rest.
Penultimate refreshment
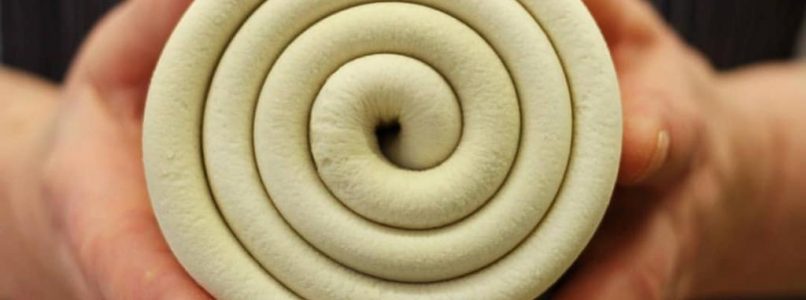
The last refreshment has a different procedure from the previous ones, even if the ingredients are always the same. You always start working in the bowl, but move everything quickly on the work surface, working with the fold technique: that is, the dough must be folded on itself repeatedly, turned on the side of the closure and redone the operation several times. After the first folds, when all the ingredients are incorporated and the mass is not yet smooth, you can start working with a rolling pin, dusting the dough with the flour only slightly. With a rolling pin, make a central groove, then press the dough and spread it a bit to proceed to make other folds. He turns several times, making the same passage. When it starts to get hard, as they say in jargon it begins to string, you make the last step: you stretch the dough like a long tongue, as thin as possible, then fold in three on the short side and close by making a roll, ending with a deep cross cut, made with a smooth blade knife. It is then left to rest in a bowl covered with a tea towel, which should be closed on the yeast, but in an impervious manner. We wait three hours and after 3 hours we put it in the refrigerator. When it has more than doubled its volume, the yeast will be ready.
Bath and last refreshment
Before being worked, there is still a step to do, because it is a must to bathe him. Cut it well with a knife and appreciate its honeycomb. Remove the outer skin, which is more leathery because it is the oxidized parts, and take the heart. The bath should be made in a bowl with warm water and sugar, which should be left on the bottom of the bowl, without letting it melt. Then put the mother yeast, cut into large cubes, pressed and folded so as to remove the gas inside and leave it in the solution of water and sugar for 20 minutes. Once this is done, the yeast should be squeezed with your hands and refreshed again with the same weights as the other refreshments. You always work starting from the bowl, incorporating all the ingredients before moving on the work surface and starting again with the folds and with the rolling pin as in the previous step. When the dough has become tenacious, spread a tongue of dough with a rolling pin, to be divided into two parts. One will be usable for your preparations after making a cross with the knife and leaving it to rest for three hours at room temperature. The other will be ready to be kept in the refrigerator, always after three hours of waiting, and will be the mother for subsequent times.
Management
A good mother yeast must be regenerated at least every 48 h in order to always be healthy. It would be even better to refresh it every day to always have a perfect yeast. When you want to use it for your own preparations, you must always do as in the last step, that is, once cooled, divide the dough in two: one part goes to the fridge for the following times and one part for 3 hours at room temperature before use it. It would also be ideal to do it every day. It is also important that it remains in the fridge, always stored in the bowl covered by the tea towel, but never hermetically sealed.